Regions
Regions of Interest (ROIs)#
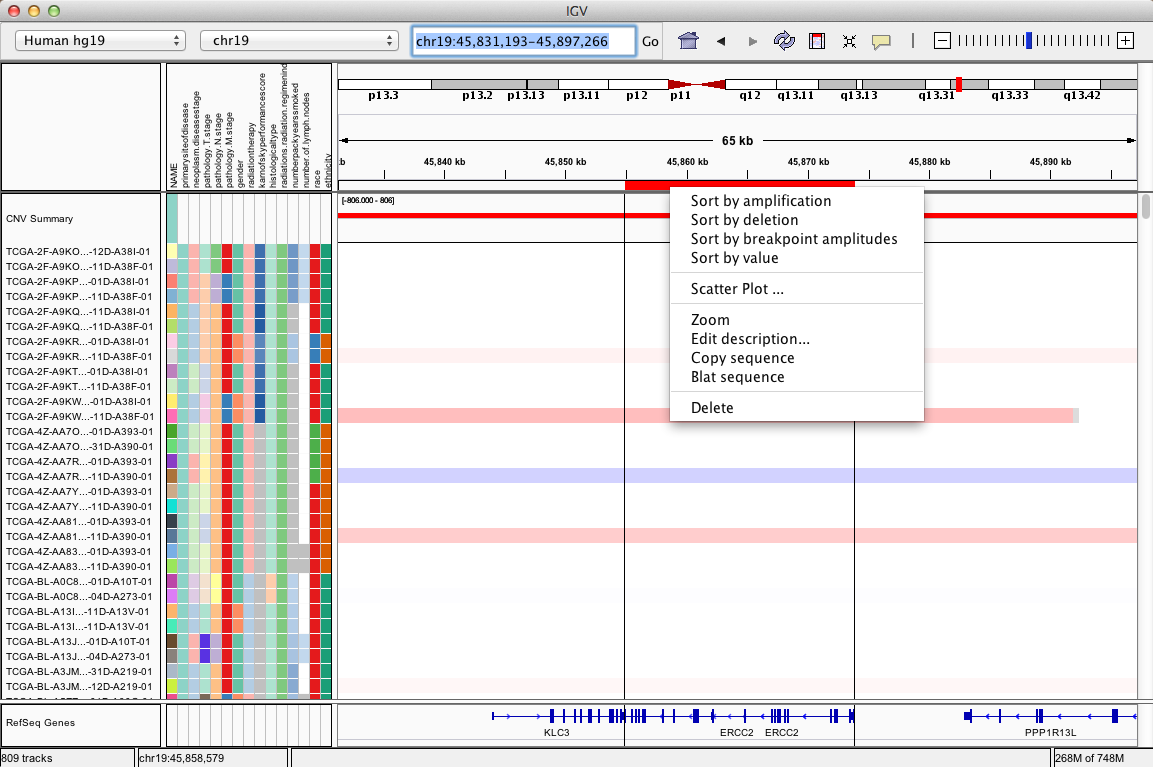
Regions of interest (ROI) are intervals defined by the user using one of the methods described below. ROIs are marked in red below the ruler. Hovering the mouse over this red region displays lines that demarcate the ROI down the panels. Clicking on the red highlight pops up a menu for options that include sorting by various data-specific metrics and copying to the clipboard or BLAT searching the corresponding reference sequence.
Defining an ROI#
1. By mouse:
First, click the Region of Interest icon in the toolbar:
![]()
Then, single click in the data panel at the start of the region and then the end of the region. Do NOT click and drag. Lines delimiting the region of interest will be displayed for the first and second click, then marks the region in red under the ruler.
2. By keyboard shortcut:
Display the region of interest to fill the entire view and press Control + R.
- The entire ruler view will be marked red to indicate the region of interest fills the view.
- Does not work to select multiple regions at once in multi-locus view.
3. Using the Region Navigator:
See the section on the ROI navigator, below
ROI menu options#
Click the red bar under the ruler to display the region of interest (ROI) context menu for the following options.
| Menu option | Description |
|---|---|
| Sort | Sort based on data values within the ROI. Sort options vary with data type and may not be available for regions of interest for certain file types, e.g. alignment or VCF tracks, for which sort options are available via feature pop-up menu. * For copy number variation data, sort by amplification, deletion, breakpoint amplitudes, and value. * For mutation data, sort by mutation count or value. * For expression data, sort by expression or value. |
| Scatter Plot | Available for continuous value data, e.g. gene expression, copy number, and methylation data. |
| Zoom | Center and zoom the display to the ROI. |
| Edit description | Input a short description for the ROI. |
| Copy sequence | Copy the reference sequence to the clipboard. If the region is too large for the clipboard, nothing will be copied. |
| BLAT sequence | BLAT search the section of the reference sequence against the entire reference genome. See the BLAT tool page for details. |
| Delete | Remove the region of interest. |
ROI navigator#
The Region Navigator lists all current regions and allows you to provide a description for each, add new regions, and delete selected regions. To open the Region Navigator select Regions>Region Navigator from the menu bar.
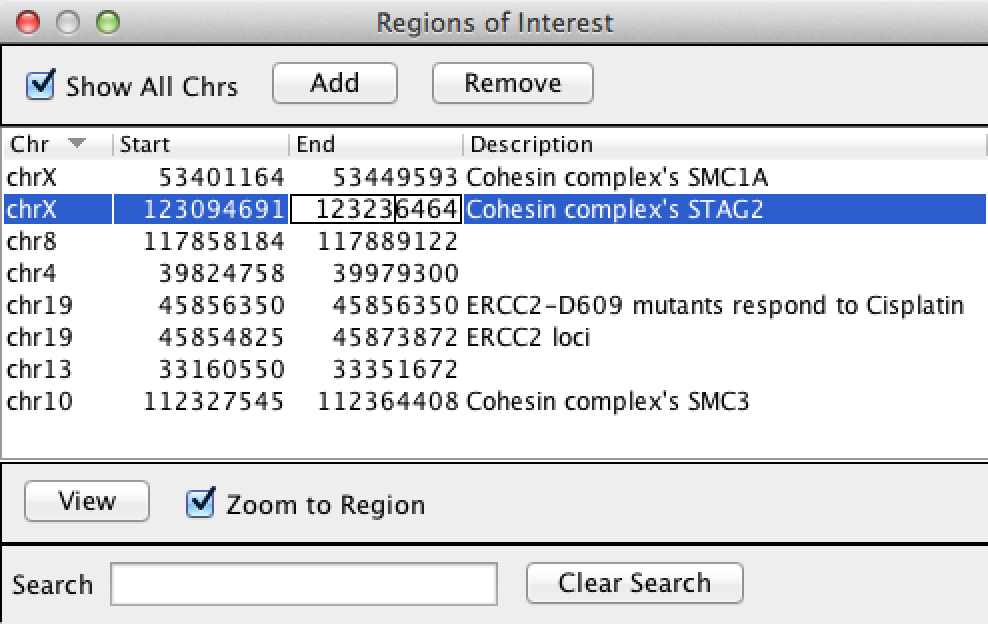
The Description field is initially blank. To input a description, either right-click on the ROI and select Edit description from the menu or double-click the field in the Region Navigator.
The following table summarizes the features available from the Region Navigator.
To select an ROI from the list, click on it. Select multiple ROIs from the list by holding down a keyboard key and clicking by mouse, e.g. Shift + mouse-click for consecutive rows or [Mac/PC] Command/Control + mouse-click to select individual rows.
| Region Navigator feature | Description | |
| Define ROIs | Add | Add the currently displayed region in its entirety to the list. |
| Delete | Remove the selected ROI from the list. | |
| Double-click cells under Start, End, or Description | The cell will be boxed as shown in the Screenshot above. Edit cell content. | |
| Sort list | Show All Chrs | Uncheck or check to limit the list to loci on the displayed chromosome or all chromosomes. |
| Click a column header, e.g. Chr | Sort table by ascending or descending alphanumeric order. | |
| Search and Clear Search | Type a search term on which to filter the displayed list. To remove the filter, click Clear Search. | |
| Navigate to ROIs | View | Navigate the display to the selected ROI. If multiple ROIs are selected in the navigator, the loci display in split panes. |
| Zoom to Region | Uncheck to keep the current zoom level when navigating to a new ROI. Check to ensure IGV adjusts the zoom level to display the entire ROI when navigating to the new ROI. |
Importing/exporting regions#
In the menu bar, select Regions > Export Regions... to saves all currently defined regions of interest to a BED file. If no regions of interest are defined, no BED file is created.
Select Regions > Import Regions... to select a BED file of regions to add to the set of regions of interest.
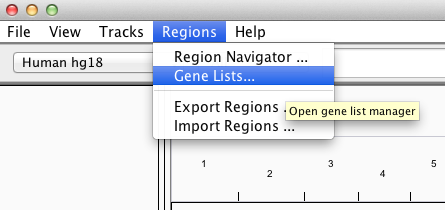
Gene Lists#
To view a gene list or define a new one, select Regions >Gene Lists....
This opens a window for selecting an existing list or creating a new list.
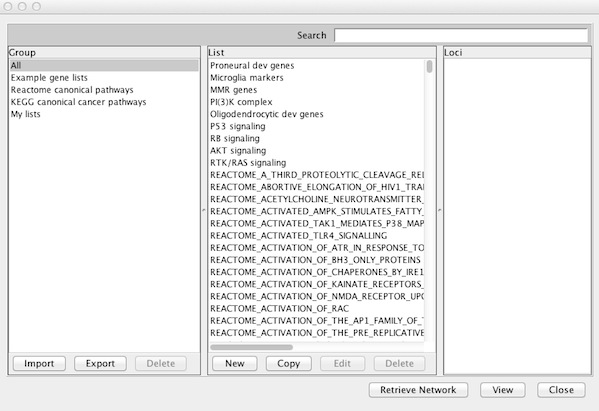
To view an existing gene list in multi-locus view, select a name in the List column of any Group and click View. IGV informs you of items that cannot be mapped to the current reference genome and continues on to display loci with matches.
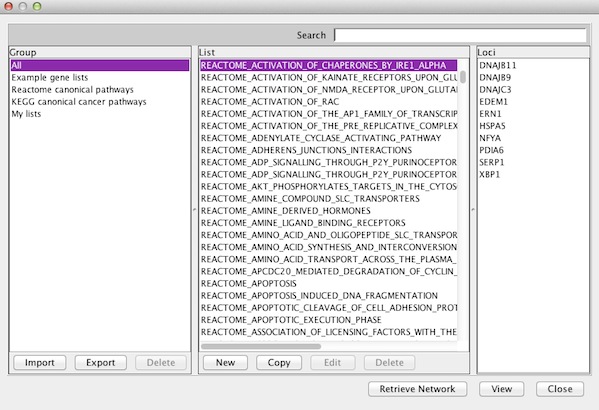
My gene Lists#
You can click Import to upload a text file containing your own gene list. Load lists of genes or loci in GMT, GRP or BED format. For example, find and download GMT files from the Molecular Signatures Database (MSigDB).
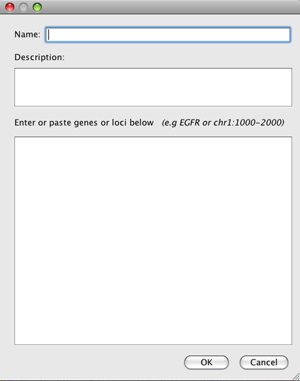
You can also click New to create a new gene list. This opens a dialog in which you can enter a name, description, and your list of genes or regions.
- Entries in a gene list can be a gene symbol or other feature names that correspond to annotation tracks, or a locus defined as
<chr>:<start>-<end>. - Alternatively, paste a BED format file contents.
New and imported lists will appear under the My lists group and are saved for continued future access in the lists subfolder in the igv folder installed in your home directory.